Level 1.

About Level 1

This four day course presents and demonstrates the myofascial release techniques created by Don Desrosiers, RMT. Don has written a 141 page manual complete with illustrations and a systematic written breakdown of all assessments and techniques. The course covers detailed descriptions of Thomas Myers 11 myofascial meridians and a basic understanding of the anatomy of fascia (received approval to use Anatomy Trains as a required text). The course includes a detailed standing postural and table assessment and a complete module committed to exercise therapy. The techniques utilized for the myofascial tree are designed to increase postural awareness and mechanical efficiency for the practitioner. The four days will encompass Myofascial theory coupled with hands on application. The first 4 modules provide a theoretical, postural, and a structural understanding of not just the patient you are treating but of yourself, the therapist, and how you move through space. Module 5 is all about the maintenance that leads to a happier, more balanced physical body for you and your clients.


Register Now

Course Outline

Day 1

8:30 – 9:30 60 minutes Overview of Thomas Myers 11 myofascial meridians
9:30 – 10:00 30 minutes Hands on meridian lab. Using saran wrap, students will recreate each meridian on each other as a visual and palpable demonstration.
10:00 – 10:30 30 minutes 
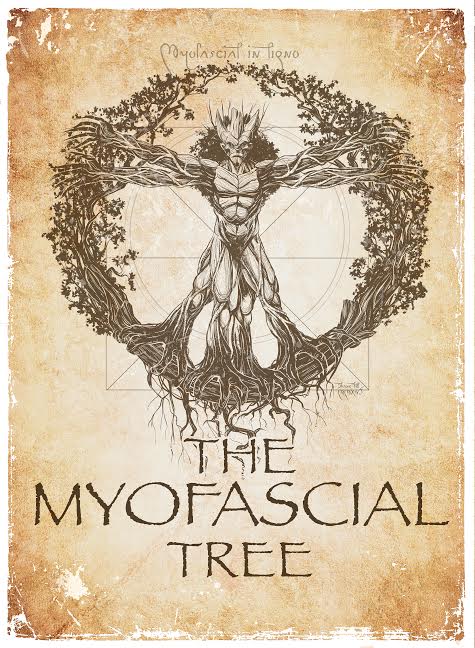
The 5 branches of the myofascial Tree, which are sights of congestion where multiple myofascial meridians overlap. A theoretical description coupled with illustrations within the manual. This provides an understanding of how myofascial planes overlap.
10:30 - 11:00 30 minutes Meridian hierarchy teaches the relationship between the primary and the reactive meridians. This provides an understanding of how the meridians interact and compensate with each other.
11:00 – 11:45 45 minutes LUNCH BREAK
11:45 -12:00 15 minutes Questions and answers about Myofascial Foundations.
12:00 – 1:30 90 minutes We start into module 2, which includes two different assessments. The 1 st assessment is a standing postural assessment. This is an adaptation of the Pete Egoscue 8 socket alignment. This assessment provides the framework to visually assess a patient before treatment. This is a weight bearing assessment. A theoretical explanation of the concept will precursor the hands on individual assessment of all the students performed by Don and then by the students themselves.
1:30 – 1:45 15 minute BREAK
1:45 – 4:15 150 minutes The non-weight bearing assessment is done on the table. There are 5 tests that we perform. The tests are collective from years of practice. An example would be my spin on the pelvic rock test from Hoppenfeld, ”Physical Examination of the Spine and Extremities”. The theoretical description of each test will include all contraindications that could occur while performing the tests. Specifically how to limb handle and prevent any ROM (range of motion) changes that could cause discomfort to the patient or irritate a pre-condition. The five tests will be demonstrated by Don, one at a time. The students will test each other and advance to the next test when they can demonstrate the safe, competent application a patient would expect.
4:15 – 4:30 15 minutes Questions and Answers to wrap up all that we covered in module two, The postural standing and non- weight bearing assessments.
4:30 – 5:30 60 minutes Switching the gears from theory to self-help. In module 5, Treasures from the vault, we explore 3 different exercise regiments from different disciplines. Today, the students will be presented and taught my 5 favorite Pete Egoscue exercises. Contraindications will be discussed to ensure the exercise suits the targeted pathology. The routine should take 30 minutes to perform but will require 60 minutes to be taught in detail. We finish our day with wellness and take home some remedial exercises for your clients. Don’s first introduction to motion therapy was Pete Egoscue and his Method of Health Through Motion.

Day 2

8:30 – 9:00 30 minutes Review Myofascial Foundations.
9:00 – 10:00 60 minutes Module 3 covers the 5 unique techniques that help a therapist project force in an appropriate line of drive in relation to the Myofascial plane that they are working on. We will cover the 1st technique, the triangle of power. Theoretical description will be followed by the class actively performing the technique while Don corrects each individual’s alignment and postural positioning.
10:00 -11:00 60 minutes The second technique, The main bow and cross bow are adapts from the Tai Chi world and are crucial to performing the next levels. We will theorize and then demonstrate how to elongate your spine eccentrically to create a strong main bow. Next on the agenda is the cross bow. It is dependent on the main bow and requires Latissimus Dorsi engagement while expanding the space across the clavicles. We will drill the main bow and cross bow through repetitive postural positioning.
11:00- 11:45 45 minutes LUNCH BREAK
11:45- 12:00 15 minutes Questions and Answers about the 1st and 2nd techniques.
12:00 – 2:00 120 minutes The 3rd technique is the Horse and the plow. We will discuss how the triangle of power and main bow compose the horse and the plow. Explain the technique and its relationship with the line of drive you challenge the connective tissue at. Students will learn how to posture yourself to maximize efficiency without injury to you and more importantly, your client. Students will develop this technique by drilling the postures and practicing body position to create a clean line of drive. At this point the students will actually be treating each other. The hands on experience will be coupled by contraindications such as how to approach rib angles, how to avoid bony compression during transition. The contraindications will vary depending on what body part we choose to demonstrate on.
2:00 -2:15 15 minutes BREAK
2:15 -3:15 60 minutes The 4th technique is ride the wave. This is another continuation off the horse and plow. The application of this technique flows from the horse and the plow. Students will learn to transition from horse and the plow to ride the wave safely and with flow. The students will develop an understanding of how to transition safely without bony compression. Limb bolstering and limb handling will be taught throughout all hands on application. How the student postures themselves will be modified to fit the individual.
3:15- 4:15 60 minutes The 5th technique is turn up / turn down the volume. This technique is an extension of ride the wave or horse and plow. The students will develop a technique that allows you to reduce myofascial drag by pronating or supinating your present hand position. This reduces bony contact when approaching scarred over tissue that will likely “clunk” due to crepitus. During the hands on component various contraindications will be discussed based on the area we are applying the treatment. An example would be to safeguard the knee ligaments with your opposite hand or bolsters while stripping the IT band or how to load a Glut without loading the opposite SI joint with your point of contact.
4:15 – 4:30 15 minutes Questions and answers about the last 3 techniques.
4:30 – 5:30 60 minutes Back to module 5, treasures from the vault. We will break down and describe in detail 5 yin yoga poses that will save your hips. While performing the poses the students will learn variations and modifications to teach and perform these exercises safely. These poses are never forced and bolstering and modifying ROM are key to a safe and successful practice. Don is a certified yoga instructor.

Day 3

8:30 – 11:00 150 minutes Module 4 encompasses the entire method of how to treat the core. The myofascial tree starts at the pelvis and works its way to the shoulder girdle. The targeted area is to restore length and balance to the deep front line. Students will start at the pelvis, applying the non-weight bearing assessments to determine where to work and when they have freed the myofascia in that plane they are assessing. This is the basis of the Myofascial Tree and the work is 3 dimensional. The students will learn to harmonize the Ilium, pubis, and femoral acetabular joint. They will apply the 5 techniques learned in Module 3, coupled with the assessment skills from module 2. They will understand the lines of drive you challenge the myofascia of the pelvis and upper leg without disrupting lymphatic drainage and circulatory function. The student will develop an understanding on how to balance the inside and outside of the thigh and its relationship with the pelvic floor.
11:00 – 11:45 45 minutes LUNCH BREAK
11:45 – 12:00 15 minutes Questions and Answers about the inner thigh and pelvis work.
12:00 – 2:30 150 minutes The second step to liberating the anterior plane is to separate the pelvis from the ribcage. This abdominal work is new to many and has a number of contraindications that should be recognized before proceeding. That said, this is the most important work you can do to liberate the deep front line and release the spine. Don will demonstrate the application of the 5 techniques to free up the psoas, diaphragm, and the abdominal muscles. The students will be coached and will develop confidence and comfort while working in the abdominal region. The pelvic rock test assessment, coupled with hand and leg length checks will be the measurement tools for the students to determine where to work and what line of drive to take.
2:30 – 2:45 15 minutes BREAK
2:45 – 3:00 15 minutes Questions and answers about the abdominal work
3:15 – 4:30 75 minutes Hands on review. All Tests from module 2, all technique applications from module 4, all applied to the anterior plane of the upper leg, pelvis, and abdominal cavity. The students will work on each other, teaching each other on all that has been taught. 75 minutes of finding your own amongst the techniques provided. Don will check bio mechanics and alignment, otherwise the student makes it their own. Don has had advanced postural training from a pilates life that started in 1998, he is a bit of a postural perfectionist.
4:30 – 5:30 60 minutes Back to module 5 and treasures of the vault. Today is Yamuna day. The students will learn a 30 minute routine to release the deep front line and balance it out with the lateral line. This is balancing out the outer and inner thigh and releasing the abdominal cavity. This is parallel with what we learned all day. The difference is this is how you release it yourself or teach to a client as maintenance as follow up care. The Yamuna body rolling is the closest form of body work to the Myofascial Tree. This ball rolling targets connective tissue and works muscles from origin to insertion tracking along the bony structure. Contraindications will be identified such as hernias, pregnancy, and recent surgical interventions. Don is a certified Yamuna instructor.

Day 4

8:30 -11:00 150 minutes Today we clean up the posterior plane of the body. The posterior iliac crest and ischial tuberosity (sit bones) have been neglected. The lower branches must be freed before the spine can be properly assessed. The hamstrings are an extension of this work due to the torque they put on the sacrum and ischium. The students will learn to free the sacrum up from three dimensional torque. The students will learn through visual assessment or palpation where the sight of restriction is and what line of drive to take to restore neutral alignment. They will balance the inner and outer thigh in the posterior plane and free the sacrum and posterior iliac crest.
11:00 – 11:45 45 minutes LUNCH BREAK
11:45 – 12:00 15 minutes Questions and answers regarding the posterior iliac crest, sacrum, IT, or hamstring.
12:00 – 2:30 150 minutes The final piece of the puzzle is the spine and its association with the shoulder blades. The students will learn to assess a spinal segment and determine whether it is in rotation or not. Assessing and then treating to restore neutral alignment of each individual segment from S1 to T1. Bolstering and supporting the clients body positioning will be demonstrated and reinforced to ensure alignment and client safety. Spine and rib contraindications will be discussed and line of drive with the ribcage will be covered in detail. Students will learn to support and bolster the shoulders to protect from dislocation and to help position the scapula to provide safer, more efficient lines of drive.
2:30- 2:45 15 minutes BREAK
2:45 – 3:45 60 minutes Practice a 60 minute treatment on your colleague. You have 55 to try and establish a neutral pelvis.
3:45 – 4:45 60 minutes Switch it up. Your colleague now has 55 minutes to treat you and establish a neutral pelvis.
4:45 – 5:30 45 minutes Written test of 50 questions. 75% or greater is a passing grade. All test responses will be directly in the Myofascial Tree Manual.

Copyright © 2016-2017 Myofascialtree.com